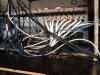
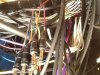
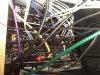
Maybe it was too much coffee, or maybe it was the fact that I was jamming to Steel Panther all day, but I decided to rewire my patch bays. Adding new things and changing things around over time has made a mess of my wiring under the hood. We all have great shots of our console setups, but what lurks beneath can get a little scary. Especially when you are running almost 96 1/4" plugs into a small space behind your rack.
The forums seemed a little quiet, so I figured I would take a couple of pictures of my mess, and post them, as well as a pdf of my newly rewired setup. If you are new to patch bays, maybe my PDF file can help. After rewiring, the whole thing doesn't look much better. I don't have perfect, custom length, color coded cables, nor do I wish to take the time to solder 100 new cables to custom length. I like options. Tomorrow, I may want to move a pre, and I don't want to find that my custom cable is two inches to short. So I went for the basic philosophy of "Keep analog, digital and power as separate as you can. Clean all contact points, plugs and jacks, (yes, all of them) with DexIT D5. Try to organize cabling lengths to the proximity of the unit to the patchbay." With that plan I went in...and I'm thrilled that the bays make more sense now. I even found a reason for 1/2 normal mode. Sweet... I've got to much time on my hands!
The forums seemed a little quiet, so I figured I would take a couple of pictures of my mess, and post them, as well as a pdf of my newly rewired setup. If you are new to patch bays, maybe my PDF file can help. After rewiring, the whole thing doesn't look much better. I don't have perfect, custom length, color coded cables, nor do I wish to take the time to solder 100 new cables to custom length. I like options. Tomorrow, I may want to move a pre, and I don't want to find that my custom cable is two inches to short. So I went for the basic philosophy of "Keep analog, digital and power as separate as you can. Clean all contact points, plugs and jacks, (yes, all of them) with DexIT D5. Try to organize cabling lengths to the proximity of the unit to the patchbay." With that plan I went in...and I'm thrilled that the bays make more sense now. I even found a reason for 1/2 normal mode. Sweet... I've got to much time on my hands!


")