You are using an out of date browser. It may not display this or other websites correctly.
You should upgrade or use an alternative browser.
You should upgrade or use an alternative browser.
Tascam DM-24 Power Supply fail
- Thread starter nickw1938
- Start date
rbrezins
Well-Known Member
- Joined
- Jul 31, 2013
- Messages
- 65
- Karma
- 2
- From
- Netherlands
- Website
- www.facebook.com
- Gear owned
- DM24 DM3200 MA-AD8 IF-DA8 TA1V
Don T you're right, forgot about that. The inductors in my PSU were and are still ok.
Diederik, check the state of the inductors first.
Maybe someone else can help you?
I ordered all caps here:
http://www.elko-verkauf.de/
Panasonic FM types.
Diederik, check the state of the inductors first.
I'd like to give you a part list, but sadly I can't anymore. I replaced all capacitors in 2009, made a part list myself by opening up the DM24, opening up the PSU and wrote my list. That part list is gone and I don't want to open up my DM24 and PSU for this.Hi, thanks, yes i am in the netherlands. In rotterdam. Can you maybe give me the specs of the parts? Thanks in advance
Maybe someone else can help you?
I ordered all caps here:
http://www.elko-verkauf.de/
Panasonic FM types.
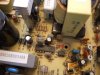
I recently installed a 2Seemy kit in my DM24 and while opening the case of the mixer I found one cap alumina cup lying around at the bottom of the mixer. The rest of cap 51 can still be found on the SW PSU PCB - view photo! This thing worked with the dead cap for years... Also other caps are bulging out - so it's time to replace them all. Bought the replacements - even found 125°C types for C51 and C45.
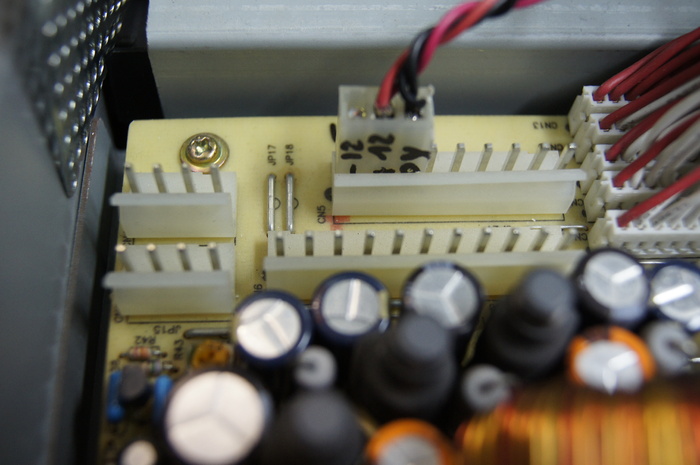
My question: C51 is exploded and I can't see from the mounted cap where - and + should be. Anyone got a picture of their PSU with C51 where I can see the minus mark on the sleeve of the cap?
My question: C51 is exploded and I can't see from the mounted cap where - and + should be. Anyone got a picture of their PSU with C51 where I can see the minus mark on the sleeve of the cap?
berl
Well-Known Member
- Joined
- Nov 29, 2012
- Messages
- 78
- Karma
- 1
- From
- Bretagne, France
- Website
- www.sonotrad.org
- Gear owned
- DM-24s DM-4800 MX-2424 DR40
berl
Well-Known Member
- Joined
- Nov 29, 2012
- Messages
- 78
- Karma
- 1
- From
- Bretagne, France
- Website
- www.sonotrad.org
- Gear owned
- DM-24s DM-4800 MX-2424 DR40
berl
Well-Known Member
- Joined
- Nov 29, 2012
- Messages
- 78
- Karma
- 1
- From
- Bretagne, France
- Website
- www.sonotrad.org
- Gear owned
- DM-24s DM-4800 MX-2424 DR40
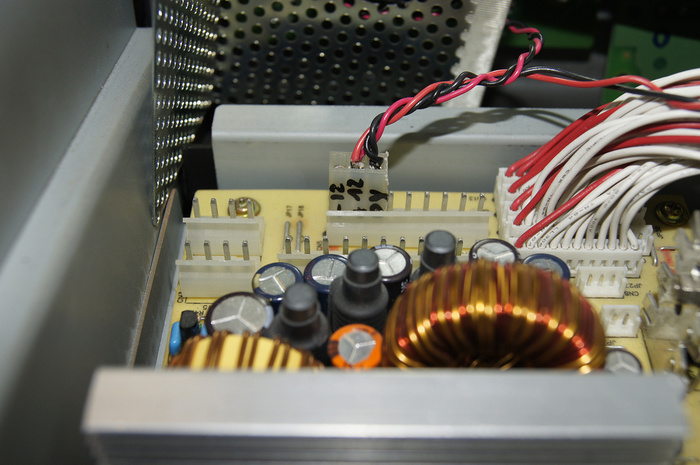
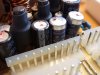
A last one ")
About the 12V cables at the top, they go to the fan :
It is my no-overheat insurance once the caps are new.
About the 12V cables at the top, they go to the fan :
It is my no-overheat insurance once the caps are new.
Last edited:
berl
Well-Known Member
- Joined
- Nov 29, 2012
- Messages
- 78
- Karma
- 1
- From
- Bretagne, France
- Website
- www.sonotrad.org
- Gear owned
- DM-24s DM-4800 MX-2424 DR40

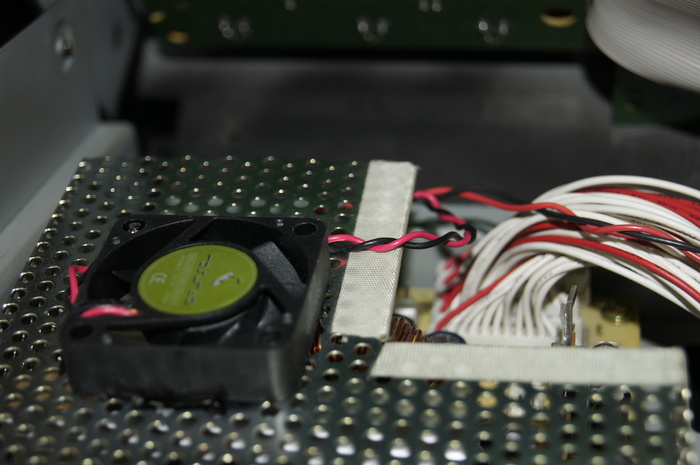
The second fan is a slot one, see here :
http://diato.org/sonotrad/DM_24_internal_fan/
I have added this to all my DM-24s and also on my DM-4800.
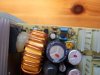
Thanks berl for the pics - the orientation on the pics matches with what I reverse engineered on the backside of the PCB. I was ready to solder it in in the way I thought it has to be. Now I'm confident of the polarity - thanks again!
Thinking about your fan mod - maybe I'll install something like this later. Have to finish a project on the desk right after the caps are in...
Thinking about your fan mod - maybe I'll install something like this later. Have to finish a project on the desk right after the caps are in...
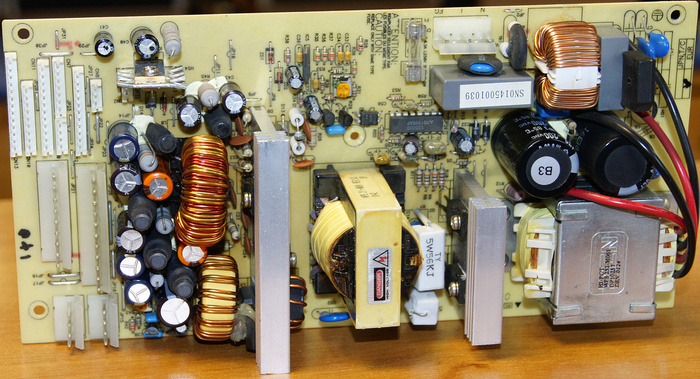
Finally I changed all caps in the SW PSU of the DM24 except the two big 200V caps on the input side of the pcb. The unit works perfect after the change - long time success still to be verified.
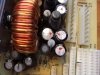
For all of you thinking about this mod/repair I saved the parts list and did a bunch of pictures of the PSU. Orientation of the caps on the board is no problem as there is a thick black mark on the minus side of the cap for all electroyte caps on the pcb - just for your reference. Have to remove the glue anyway which is quite easy.
Please download the detail pics of the PCB here: https://app.box.com/s/nkekya385s6chs73nr3ztopnjma9gni6


Note: the two 470µF/16V originally on the board are 8mm diameter type with 5mm spacing of the leads - I coudn't get hold on these. That is why I ordered two pairs: one type was 470µF/16V/8mm with 3.5mm spacing and the other type was 470µF/16V/10mm with 5mm spacing. The last one fitted my PCB so the 8mm ones are spares...
Note 2: the 100µF/50V/8mm originally was a 35V type which I couldn't find either - so I used the 50V type as found in the parts list
I ordered the normal 105°C types at www.elko-verkauf.de and the 125°C 1000µF/10V/10mm at www.rsonline.de (order # 7621648) - this type came in a package of five pieces only, so I still have 3 spares in case they blow up again.
Overall price was EUR 35,- incl. delivery.
For all of you thinking about this mod/repair I saved the parts list and did a bunch of pictures of the PSU. Orientation of the caps on the board is no problem as there is a thick black mark on the minus side of the cap for all electroyte caps on the pcb - just for your reference. Have to remove the glue anyway which is quite easy.
Please download the detail pics of the PCB here: https://app.box.com/s/nkekya385s6chs73nr3ztopnjma9gni6
Note: the two 470µF/16V originally on the board are 8mm diameter type with 5mm spacing of the leads - I coudn't get hold on these. That is why I ordered two pairs: one type was 470µF/16V/8mm with 3.5mm spacing and the other type was 470µF/16V/10mm with 5mm spacing. The last one fitted my PCB so the 8mm ones are spares...
Note 2: the 100µF/50V/8mm originally was a 35V type which I couldn't find either - so I used the 50V type as found in the parts list
I ordered the normal 105°C types at www.elko-verkauf.de and the 125°C 1000µF/10V/10mm at www.rsonline.de (order # 7621648) - this type came in a package of five pieces only, so I still have 3 spares in case they blow up again.
Overall price was EUR 35,- incl. delivery.
Attachments
berl
Well-Known Member
- Joined
- Nov 29, 2012
- Messages
- 78
- Karma
- 1
- From
- Bretagne, France
- Website
- www.sonotrad.org
- Gear owned
- DM-24s DM-4800 MX-2424 DR40
You can now change your obsolete switching PSU by an ATX slim line, it works very well.
I made a PCB interface between ATX and tascam connectors, see here.
A seasonic slim line (250W) costs 60€ and the PCB 15€, just some work to unsolder the old connectors (or buy new ones for ~12€), a ATX connector from an old motherboard and some solder job
I made a PCB interface between ATX and tascam connectors, see here.
A seasonic slim line (250W) costs 60€ and the PCB 15€, just some work to unsolder the old connectors (or buy new ones for ~12€), a ATX connector from an old motherboard and some solder job
Last edited:
Muziekschuur
Soundaholic
- Joined
- Sep 29, 2012
- Messages
- 323
- Karma
- 26
- Gear owned
- Tascam DM24
berl
Well-Known Member
- Joined
- Nov 29, 2012
- Messages
- 78
- Karma
- 1
- From
- Bretagne, France
- Website
- www.sonotrad.org
- Gear owned
- DM-24s DM-4800 MX-2424 DR40
The ATX PSU is smaller than the old obsolete PSU, and most important : far more cooler !

The hot air is blown out via the openings I made on the side.
The hot air is blown out via the openings I made on the side.
Berl, does any of the noise with the Seasonic PSU leak through or show up as hum/or otherwise measurable as Fiber suggested, if you did or didn't check it through a scope? I haven't had a 'real' scope for 15 years, but it could work using software. I've switched everything that uses a PSU to either OCZ or EVGA PSUs, including one DM-24; everything has been free of whine (or any other noise) since I did. If one didn't want to install a PSU inside or couldn't get a smaller unit such as the Seasonic, you could extend it easily enough, and isolate/build it into a separate PSU box, under your console. A friend did that with his rig where I got the idea. The mixing boards each plug into their own UPS/battery backup unit, and I use one for each set of rack gear rack or of keyboards, depending on load. It's made everything quiet, with no brownouts, fluctuations, etc, and when the power company has a drop out, which is getting to be a huge concern, it's saved a lot of my gear, computers, studio, and monitors, over the years. I put a large and slow rpm, quiet PC case exhaust fan underneath the mixer, which pulls cooler air in through filtered dual cutouts, one on each side, through the board then out the bottom. Bit of work but worth it. Thanks for the clear photos.
Couple of things...
First, there are 2 power supplies. One for the analog circuits, and this problem child switching supply for the DIGITAL circuits.
Second, replacing the switching supply with an OTS mini ATX supply should be absolutely no issue as long as you chose a good quality, well shielded one (they mostly all are) and do a good job on the conversion board/install.
Extra ventilation is a great idea.
BTW I'm in the process of recapping both supplies
Trying to upload my parts list....