- Joined
- Feb 22, 2013
- Messages
- 10
- Karma
- 0
- Gear owned
- DP-32, 2488neo
How to move complete songs, including individual tracks from a Tascam 2488neo to a Tascam DP-32 (DP-24 and DP-32SD should work the same way). The 2488neo’s USB 2.0 port is only compatible with Windows XP, 2000 or Vista and Apple Mac OS 9.2, 10.2 or later so you must have one of these machines to make this work. This procedure was done with Windows 2000 Professional, so no guarantee it will work on other OS. I’m also not sure if this is exactly how the 2488, 2488mkII or 2488mkII Blue work.
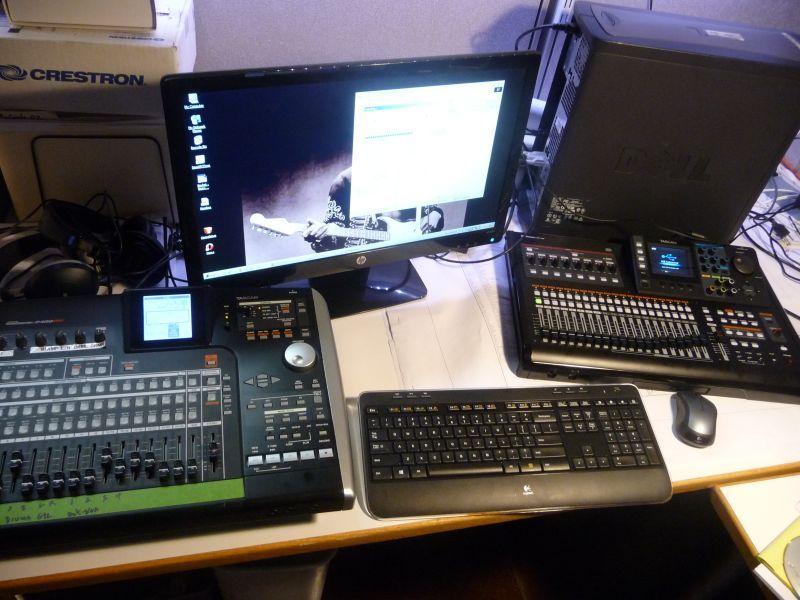
1. Boot up the PC, turn on and connect the 2488neo and DP-32 to the PC.
3. On the 2488neo:
Notes:
1. The track files will not retain any pan, effects or send settings; they are just the raw audio tracks.
2. Track reassignments during upload to the DP-32 can get messy especially when copying stereo tracks.
3. If you have a lot of songs to copy, this process will take a ridiculous amount of time so plan ahead. It took several hours just to get comfortable with the process and several hours more to transfer about 20 songs. Along the way I accidently copied unneeded tracks from previous songs and had to delete them requiring more time.
4. Mastered tracks have to be copied separately. The process is similar, but before you blow your 2488neo song files away, you should backup any masters too.
5. The new song file on the DP-32 must be set up with the same bit rate (16 or 24) and sampling rate (44.1 or 48kHz) as the source files. If not you will get an error message.
6. You cannot mix 16 and 24 bit tracks or tracks recorded at different sampling rates within a song as far as I know.
7. Before you copy new song tracks to the 2488neo’s FAT, it’s important to delete previous tracks. If you don’t, you will have legacy tracks from previous song transfers mixed in with the new tracks. (New tracks will overwrite old tracks with the same name, but not tracks with other names.)
8. You can eliminate some steps by copying tracks straight from the 2488neo’s FAT to the DP-32’s Audio Depot, but then you won’t have any backup files.
1. Boot up the PC, turn on and connect the 2488neo and DP-32 to the PC.
You will need two different types of USB cables to connect:
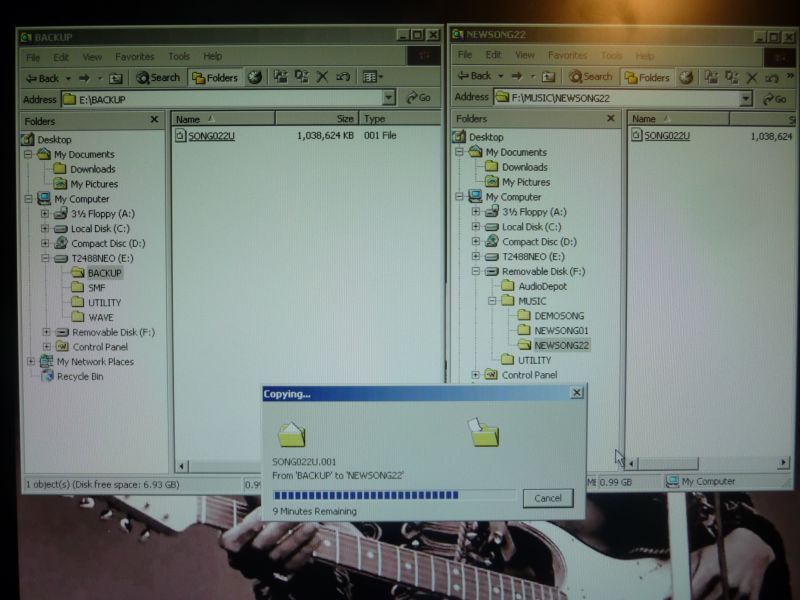
2. Create destination folders on the PC for each song you want to move.- 2488neo: USB 2.0 Type A/Type B
- DP-32: USB 2.0 Type A/Type B mini
(Suggest the same name as on the 2488neo to reduce confusion.)
3. On the 2488neo:
a. Clear and set the target FAT partition (File Allocation Table):
c. With the transport stopped, press the MENU button
d. Highlight the WAVE IN/OUT icon with the scroll wheel, press YES/ENTER
e. Scroll to USB EXPORT and press YES/ENTER
f. A list of tracks will appear and the FAT partition target. You can select one track or multiple tracks by using the cursor buttons and the INSERT & DELETE buttons under the MARK/TITLE menu. (A check mark will appear next to selected tracks.)
g. Once you’ve selected the tracks for export, press YES/ENTER
h. A screen will appear that allows you to select 16 or 24 bit and also shows you how much room is left on the FAT. It’s critical that the space on the FAT accommodates the combined size of the tracks or you will get an error message. If so, you will have to clear existing FAT files, use a larger FAT partition or change the size of the FAT.
i. Press YES/ENTER twice. The transfer will take an absurdly long time.
j. Once the files are copied to the FAT, exit out and press the MENU button again.
k. Highlight the DISK icon and press YES/ENTER
l. Scroll to the USB OPEN/CLOSE icon and press YES/ENTER twice.
m. Your PC should recognize the 2488neo as a drive named “T2488NEO”
n. Open “T2488NEO” and open the “WAVE” subdirectory
o. You should see the tracks(s) you copied to the FAT
p. Drag and drop these files to the folders you set up on the PC. This will take a while.
4. On the DP-32: i. Press MENU, scroll to DISK and press YES/ENTER
ii. Scroll to FAT REFORM and press YES/ENTER twice
b. Load the song you want to move.ii. Scroll to FAT REFORM and press YES/ENTER twice
c. With the transport stopped, press the MENU button
d. Highlight the WAVE IN/OUT icon with the scroll wheel, press YES/ENTER
e. Scroll to USB EXPORT and press YES/ENTER
f. A list of tracks will appear and the FAT partition target. You can select one track or multiple tracks by using the cursor buttons and the INSERT & DELETE buttons under the MARK/TITLE menu. (A check mark will appear next to selected tracks.)
g. Once you’ve selected the tracks for export, press YES/ENTER
h. A screen will appear that allows you to select 16 or 24 bit and also shows you how much room is left on the FAT. It’s critical that the space on the FAT accommodates the combined size of the tracks or you will get an error message. If so, you will have to clear existing FAT files, use a larger FAT partition or change the size of the FAT.
i. Press YES/ENTER twice. The transfer will take an absurdly long time.
j. Once the files are copied to the FAT, exit out and press the MENU button again.
k. Highlight the DISK icon and press YES/ENTER
l. Scroll to the USB OPEN/CLOSE icon and press YES/ENTER twice.
m. Your PC should recognize the 2488neo as a drive named “T2488NEO”
n. Open “T2488NEO” and open the “WAVE” subdirectory
o. You should see the tracks(s) you copied to the FAT
p. Drag and drop these files to the folders you set up on the PC. This will take a while.
a. With the transport stopped, press the MENU button
b. Highlight the USB icon with the scroll wheel, press F4, then F2
c. The “USB Connected” screen should be displayed and there should be a new “Removable Disk” folder on the PC.
d. Drag the tracks from your song folder into the DP-32’s “AudioDepot” folder. This will take a while. (Make sure the DP-32’s AudioDepot folder is empty first.)
e. Once the files are copied into the AudioDepot folder, press F2 on the DP-32 to disconnect USB.
f. Press MENU and scroll to the SONG icon and press F4
g. Press F4 again, scroll to CREATE press F4 again
h. The menu will allow you to create a custom name, select 16 or 24 bit rate and 44.1 or 48kHz sampling rate with the cursor buttons and scroll wheel. Make sure to match the bit rate and sampling rate with the rates that you saved the track files on the 2488neo.
i. Press F2 to create the song. When complete, press MENU
j. Scroll to the AUDIO DEPOT icon and press F4. The tracks you copied into the AudioDepot folder should appear.
k. Press F1 to import the tracks into the current song. You have to do this one track at a time (F1, F4, F2, F1). You have the opportunity here to change track destination numbers, otherwise it will just default to the next track sequentially.
l. When you’re done moving all tracks to the new song file, Audio Depot should be empty and ready for the next transfer.
m. Press MENU, scroll to the SONG icon and press F4, and then F4 again and SAVE the song.
n. At this point, all the tracks should be resident on the DP-32.
Notes:
1. The track files will not retain any pan, effects or send settings; they are just the raw audio tracks.
2. Track reassignments during upload to the DP-32 can get messy especially when copying stereo tracks.
3. If you have a lot of songs to copy, this process will take a ridiculous amount of time so plan ahead. It took several hours just to get comfortable with the process and several hours more to transfer about 20 songs. Along the way I accidently copied unneeded tracks from previous songs and had to delete them requiring more time.
4. Mastered tracks have to be copied separately. The process is similar, but before you blow your 2488neo song files away, you should backup any masters too.
5. The new song file on the DP-32 must be set up with the same bit rate (16 or 24) and sampling rate (44.1 or 48kHz) as the source files. If not you will get an error message.
6. You cannot mix 16 and 24 bit tracks or tracks recorded at different sampling rates within a song as far as I know.
7. Before you copy new song tracks to the 2488neo’s FAT, it’s important to delete previous tracks. If you don’t, you will have legacy tracks from previous song transfers mixed in with the new tracks. (New tracks will overwrite old tracks with the same name, but not tracks with other names.)
8. You can eliminate some steps by copying tracks straight from the 2488neo’s FAT to the DP-32’s Audio Depot, but then you won’t have any backup files.
Last edited: